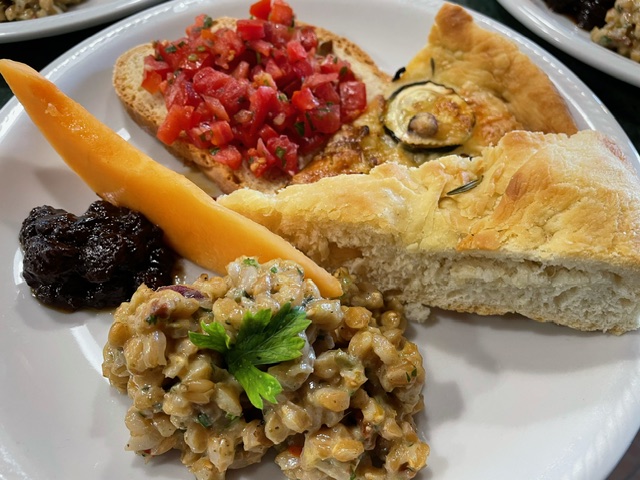
During our nine weeks working in Chef Lorenzo Polegri’s kitchen in central Italy, we made several staple dishes almost every day. For Mike, those dishes included pasta sauce, beef and pork stews, and roasted vegetables. For Caren, her daily responsibilities included salads, pizza, and focaccia (foe-ka-cha). Her bread dough creations in the antipasti were the foundation and set the tone for the entire four-course meal.
The Oven
Chef Lorenzo’s commercial oven was a big, scary and intimidating gas affair. One of our first jobs in the morning was to make sure the pilot lights were lit – one for the big stove top burners and one for the oven. Open the door, look for the pilot light’s blue flame then hold the nob in and turn until the flame spreads to the rest of the nozzles, shut the door and let the heating begin. The ovens stayed on like that all day.
To begin the bread baking process, preheat the oven to 400oF, or medium high. Without an oven thermometer, we were never sure what the temperature became through the day; but, by learning to monitor the oven, we found the right spot in the oven for baking focaccia, pizza and whatever else we assembled for the meals. I say it that way because when asking Lorenzo “what temperature do we cook the (choose any food item) at?” Lorenzo’s teaching response was “well, it’s a time equation. Consider the heaviness and dampness of the food, where it’s placed in the oven, then depending on the heat, the cooking time is either shorter or longer.” Since many ovens are hotter in the back and slightly cooler up front, monitor your item, rotate it around on the rack and let it tell you when it’s done.
Flour
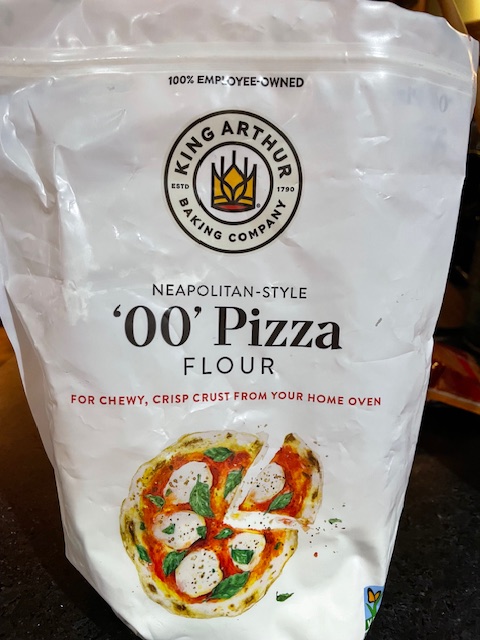
We used three types of Italian flour, plain, ‘0’, and ’00’. The primary differences are in the protein levels and the fineness of the grind. ’00’ is the finest grind and generally contains the most protein. The amount of protein on the flour package is an indication of the level of gluten in the flour. Doughs that need to be stretchy and more elastic use flour high in gluten or protein. In the U.S., artisanal bread flour is recommended for breads, focaccia and pizza dough because it has a higher amount of gluten. Look for at least 13 percent protein on U.S. packaging labels. If the protein percentage isn’t highlighted on the package, look for at least 4 grams of protein per 1/4 cup serving size. Lower protein levels are typical of all-purpose and pastry flour and result in less binding and are appropriate for biscuits, cookies or pie crusts.
Our understanding is U.S. flour is processed to survive for a long time on the shelf. Italian flour is less processed and more alive with more nutrients. If you set out a pile of U.S. processed flour and a pile of Italian flour, the bugs will choose to eat the Italian flour. The Italian flour is full of protein and nutrients whereas U.S. flour has been sterilized to the point where even a bug can tell there’s nothing good there to eat – but, it will last on the shelf for years. Take that for what it’s worth.
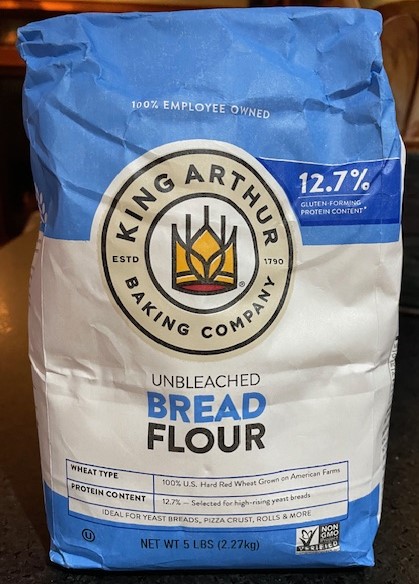
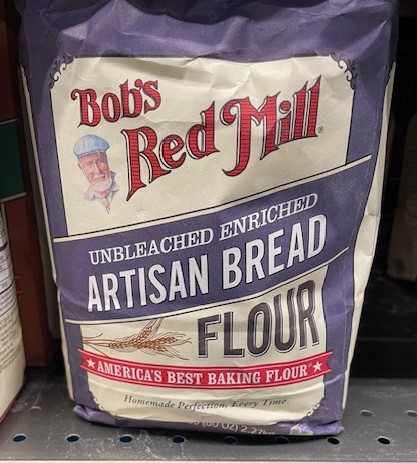
For focaccia and pizza dough, grab the high gluten, high protein flour. We want to make puffy, doughy dough. In the Pacific Northwest we’re lucky to have Bob’s Red Mill flour. Bob’s comes from Portland and was started and owned by Bob until he got to the end of his life and he left the company to his employees. You can visit Bob’s store and get a factory tour – they mill all types of flours and sell endless varieties of beans and other real foods. Long live Bob’s Red Mill!
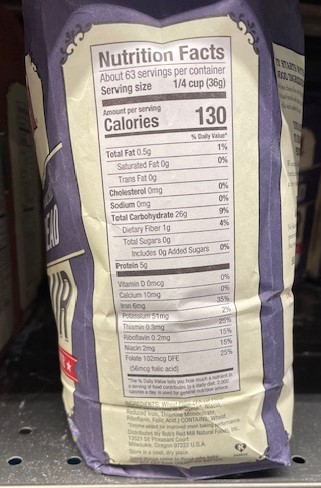
5 grams of protein in a 36 gram serving size equals 13.9% protein.
Yeast
Again, our U.S. mass production mentality makes dry yeast available for everyone. Italians use fresh yeast that comes in cubes and is in the refrigerated section of the grocery store. Buy it, use it – don’t stock it up; don’t hoard it; it’s meant to be used now. When more yeast is needed, then go to the store and buy what you need for the next baking event. Fresh yeast is ready to go to work; you don’t have to set the alarm, wake it up and give it a coffee. Fresh yeast finds the sugar and protein in the flour and doesn’t need warm water to start a reaction. I can’t find fresh yeast in our grocery stores which forces me to use two packages of dry yeast instead of one brick of fresh yeast. Dry rapid rise yeast or dry regular yeast? It’s another time/distance equation. If you don’t have a lot of time, use the dry rapid rise.
Mama Dough
Making focaccia and pizza almost every day meant we usually had some dough left over that could be stored in the fridge in an airtight container for use the next day. Lorenzo called this the Mama dough. It’s okay to make dough and store it in the fridge for a day or two. Once the new dough ingredients are mixed and kneading, add the Mama dough to the mixer and let the blending happen. Any unused dough will go back into the fridge for tomorrow’s Mama dough.
Making the Dough
Usually the goal was to prepare enough dough to build three focacce and three pizzas. Below is a list of ingredients to start the dough. If it’s not already apparent, it’s handy to have a good scale to weigh ingredients in grams.
2 kilograms high gluten flour
2 packages dry yeast
1000 milliliters water
1tablespoon sugar
2 teaspoons salt
4-ish tablespoons oil (always olive oil)
Put the yeast, room temperature water, salt, sugar and most of the oil in an electric mixer and mix until it becomes a slurry. Adding the flour slowly, add more olive oil when a little more liquid is needed. Next, add the Mama dough – set the mixer speed to medium and let her go for about seven or eight minutes – let the dough speak to you. The dough in the mixer should be a ball, not sticking to the sides of the bowl. Watch the dough mixing, if it’s sticking add more oil. When it’s just right it will bend and roll around the dough hook. When it’s done mixing and being kneaded, pour the dough onto a lightly floured countertop and cut it with a dough scraper into the proper weight size.
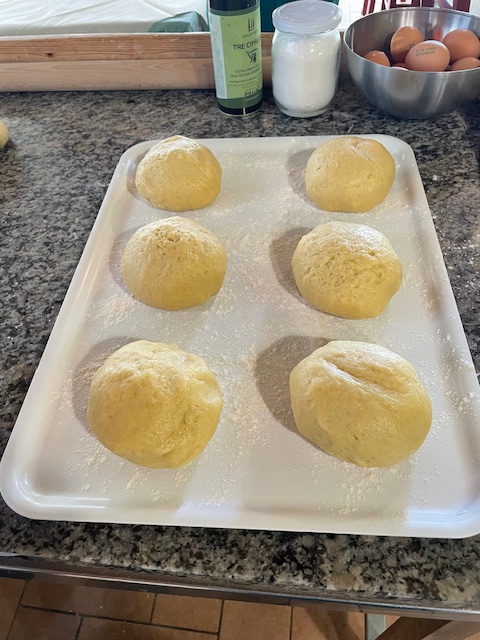
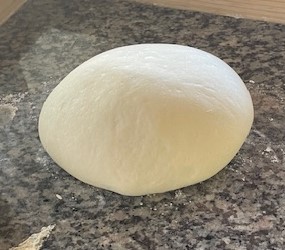
The protein components and the gluten are now elastic fibers that allow the dough to stretch without breaking. When you cut the dough, it severs the elastic gluten fibers. Try not to cut or break the dough more than necessary. Give each dough ball a couple of stretches, fold and turn, recreating a ball. The dough should not break as it stretches, we want that gluten to work; it should be elastic and stretchy. If it does break, allow it to sit, lightly covered with a tea towel to let the gluten develop. After 5-10 minutes, work the dough ball again; it should be round and smooth. Tuck and close the ends of the dough on the bottom of the ball. Let the happy ball sit on the counter for a few minutes to relax.
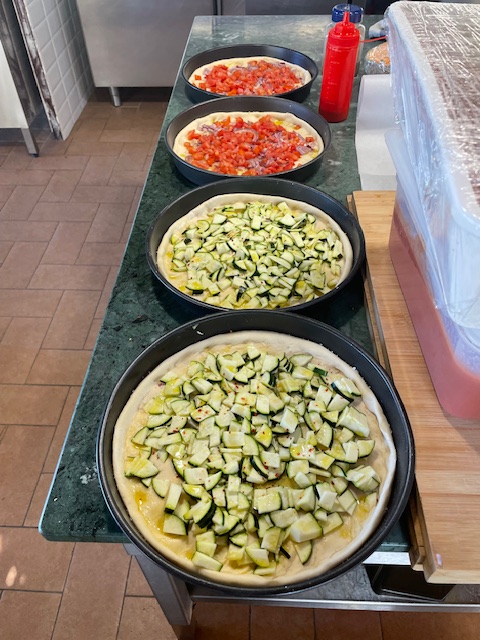
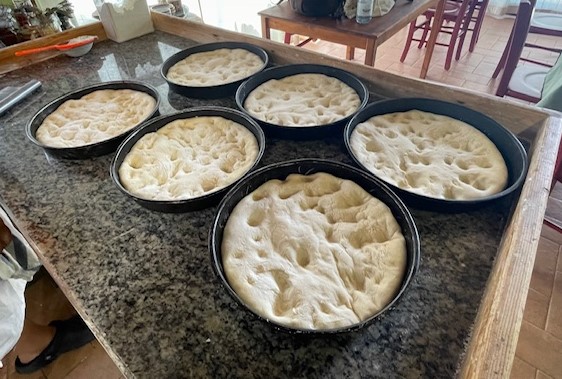
Umbrian focaccia is thick. Use a 9″ deep round pan for 650g of dough. Pizza is meant to be thin. A 10″ or 12″ shallow round pan is perfect for 350g of dough. Prep the pans by generously coating the bottom and sides with olive oil.
For focaccia, carefully hand stretch the happy rising ball into a disc matching the size of the pan. Spread it into the bottom of the pan with your fingers by pushing the dough evenly across the bottom of the pan to the edges. Let the dough rise twice, maybe three times. Put the pans with the dough in a warm area of the kitchen (we had a proofing oven) or we stacked the pans on a shelf above the stove/oven. Our kitchen was warm. If you have the air conditioner running in your kitchen you might need to use a proofing drawer. Check the dough in 15 minutes; it’s probably ready to be pushed down.
Turning Dough into Bread or Crust
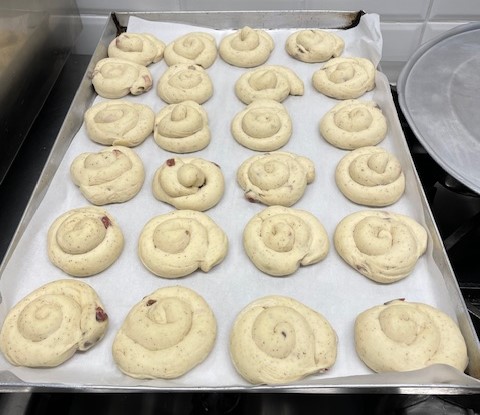
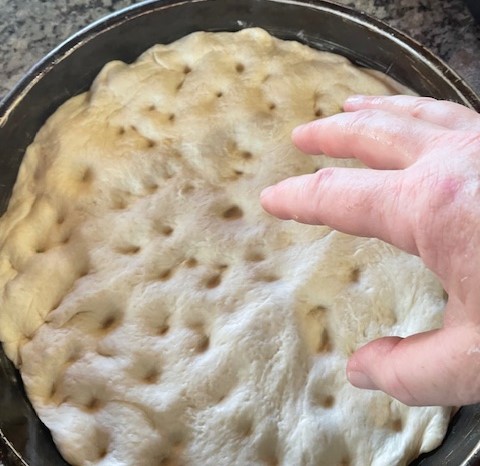
After the second rise, add your focaccia extras. The standards are course ground sea salt and rosemary needles. You can also use sun-dried tomatoes, artichoke, basil, pine nuts or small cubes of guanciale ham or small cubes of pecorino cheese. With all five fingers, dimple the dough, all the way to the bottom of the pan. The dimples should be random, less than an inch apart and cover the entire surface of the dough. Dimpling pushes your flavor ingredients into the dough where they will cook.
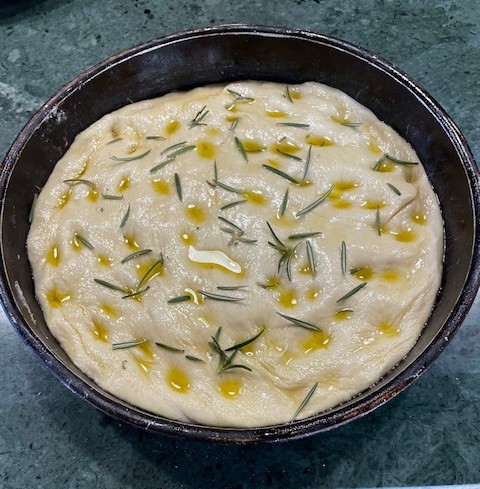
Don’t overdo the amount of flavors – since you are using fresh delicious ingredients, the focaccia should be about tasting that flavor. Simple is good. My favorite is rosemary and sea salt. Let the dough rise again before pushing it down with your five stiff finger hammer and generously drizzle your olive oil on the top so that those dimples collect puddles of olive oil. Can there be too much olive oil?
Let the dough start to rise again and then put it in the oven. Remember the oven heating discussion? Keep an eye on the focaccia. In about ten minutes, turn the pan. It should be done in 20 minutes. Probably you will smell the focaccia – that’s usually the best timer. The top will be golden and hard when you tap it. Because you generously coated the pan with olive oil, the focaccia should drop out without sticking when you turn it over. Let the focaccia sit on a cooling rack for a couple of minutes and then cut it up using the big deep butcher’s knife, drizzle more olive oil on top, serve and enjoy while it’s hot.

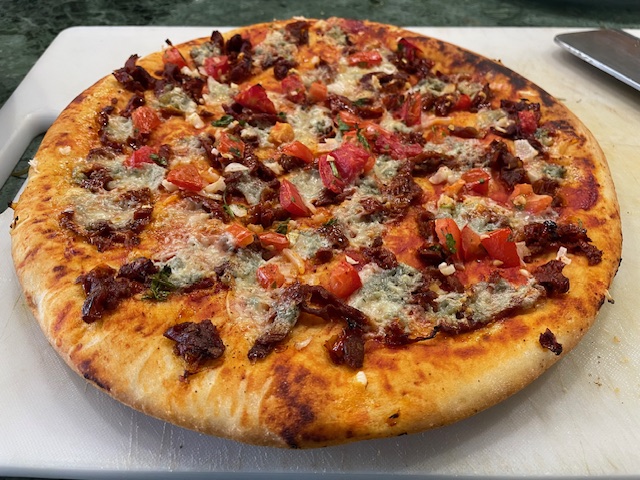
For pizza, roll the dough or hand toss to be slightly bigger than the pan. Fold the edges down and crimp or pinch to create the crust handle. The pizza dough does not need to rise again, slather with olive oil, tomato sauce, cheese, whatever your chosen ingredients are, and bake. We generally used non-meat ingredients on our pizza as this was part of our appetizer antipasti tasting plate. One of our favorite ingredients was thin sliced zucchini. Try not to add too many ingredients. Ever present is Chef Lorenzo’s direction “Don’t exaggerate!” And, basil is only added after the baking. Pizza takes less time to bake, maybe 10-15 minutes…depending on how the oven is behaving.
Buon Appetito!

Leave a comment